How to connect Facebook and Instagram with MindBeamer
You connect your account once. From then on we publish in your name, only on the page you choose. Here is every step with real screenshots from the Facebook dialog.
Facebook shows you these screens in your own language. The buttons are always in the same place as in these screenshots, which we recorded in English.
What you need first
A Facebook Page
A private profile is not enough. Facebook only allows automatic publishing through a Page. If you do not have one yet:
Create a Facebook PageInstagram is optional
Without Instagram, Facebook works on its own, that is not an error. If you also want Instagram, it needs to be a Business or Creator account linked to your Facebook Page.
The one rule that matters
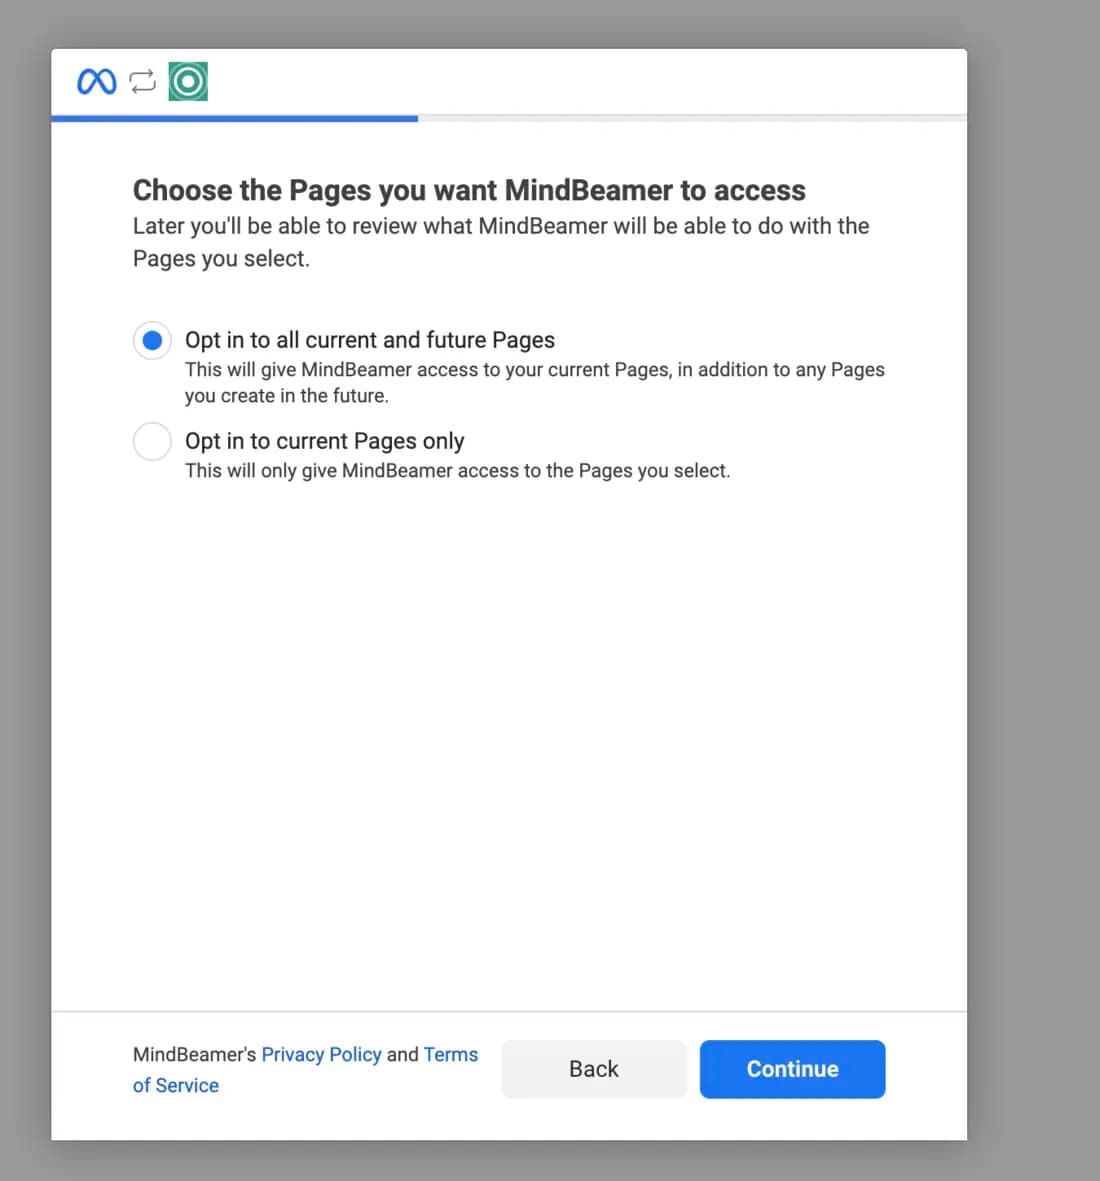
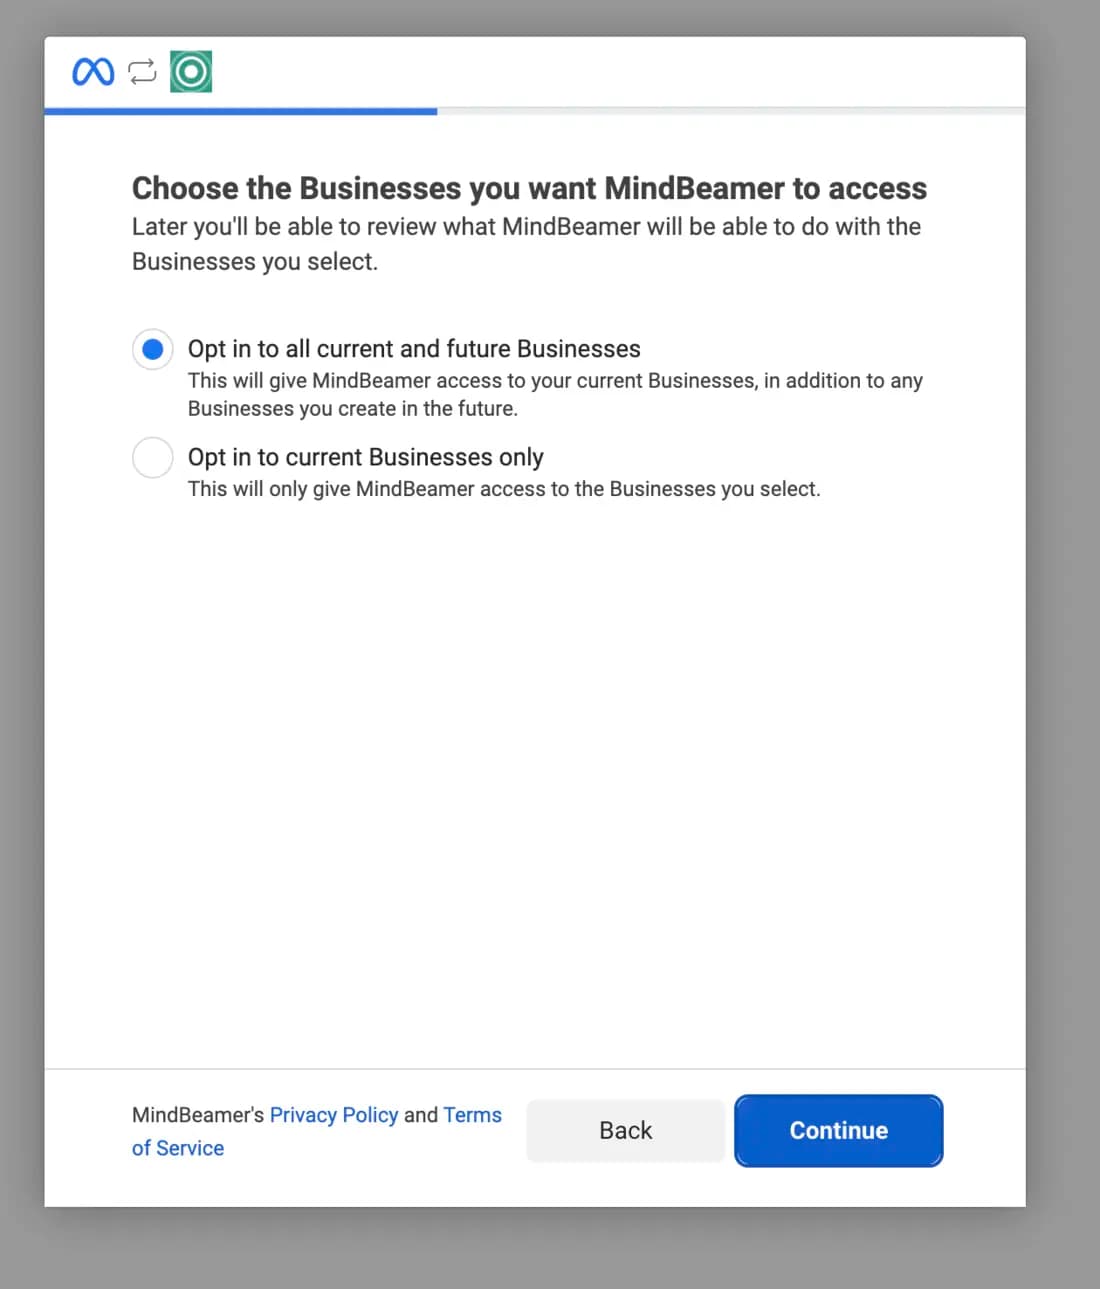
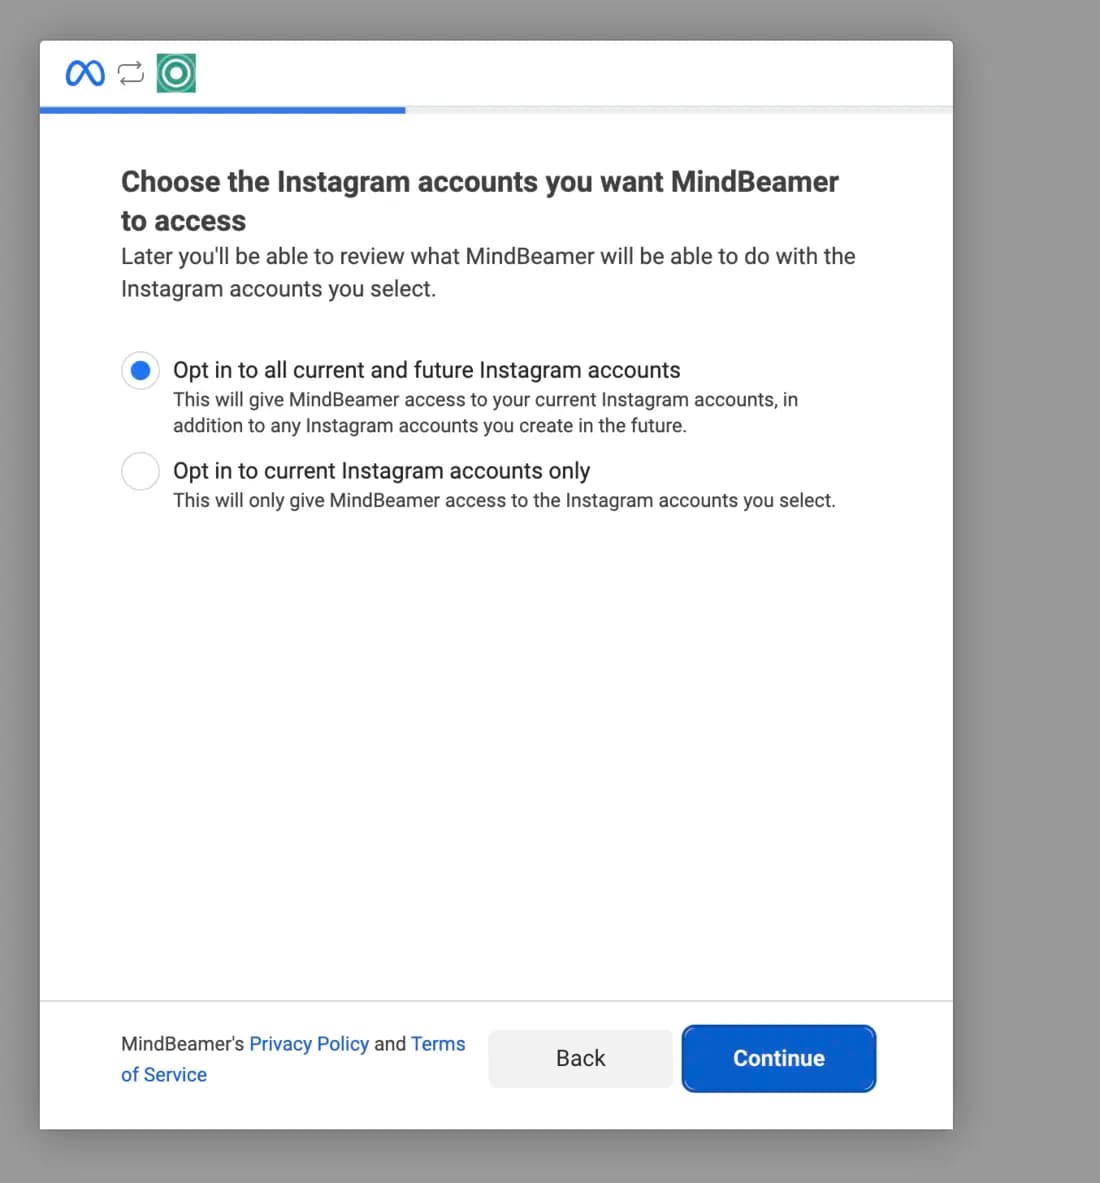
Facebook asks you almost the same question up to three times. Pick the top option every time.
The permission applies to your whole Facebook account, not just this one project. If you only select the one page, another project in your account quietly loses its rights, and that only shows up once a post there fails to go out.
If you do not want that, pick individual pages instead, but then every page you will ever use with MindBeamer, not just this project's.
Step by step
- 1
Click “Connect Facebook & Instagram”
You land directly on Facebook.
- 2
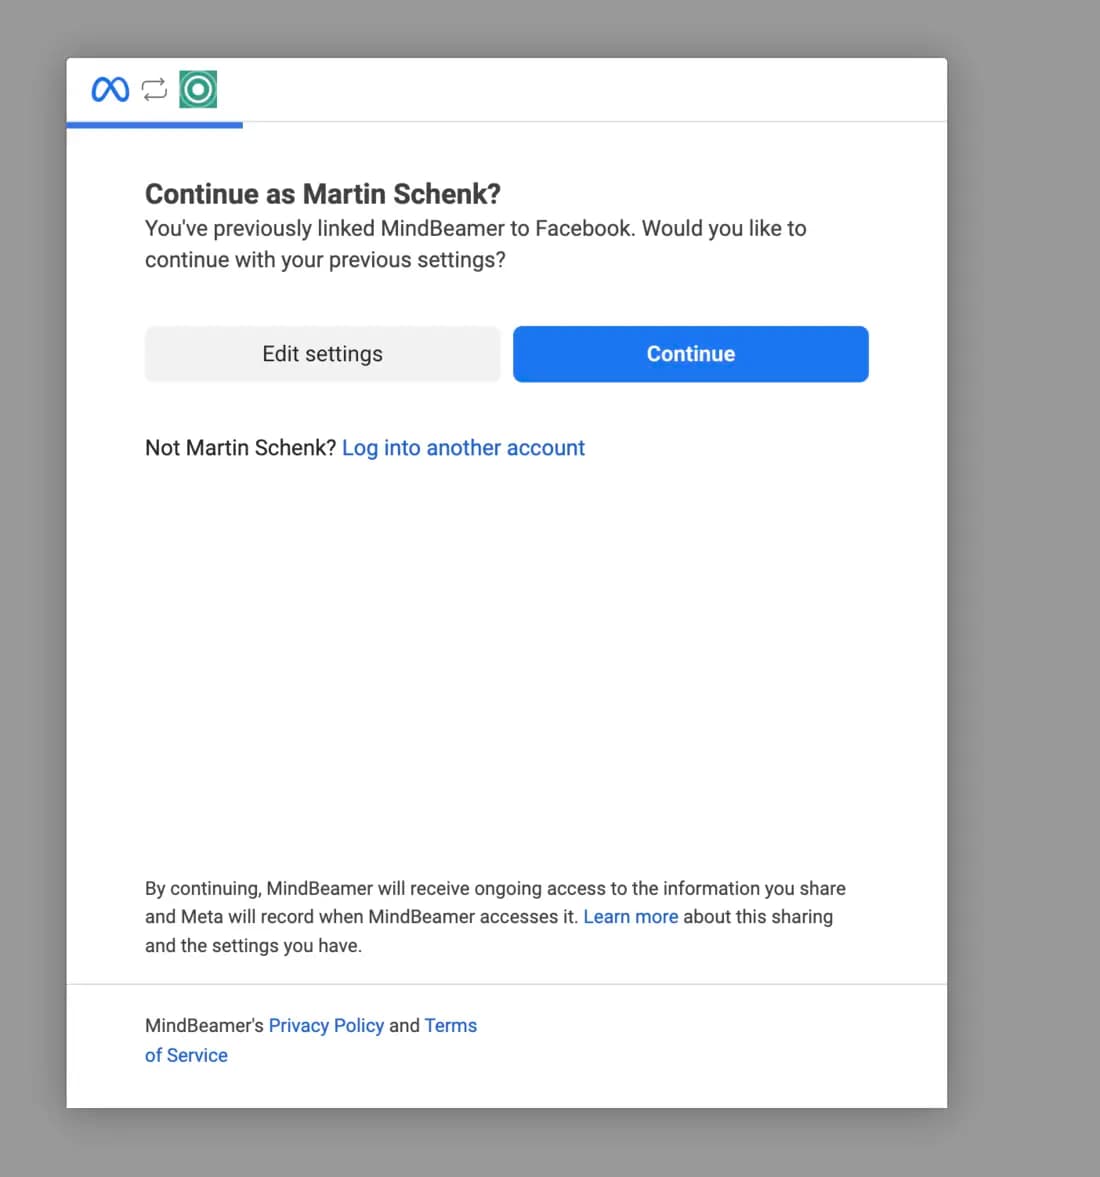
Have you connected before?
Facebook does not show you a list, it shows your last selection. Click “Edit settings” (not “Continue”), otherwise Facebook quietly keeps the page from your last project.
- 3
Pages: the top option
“Opt in to all current and future Pages.” This does not yet give us a page to post to, which page this project uses is what you pick next, with us.
- 4
Businesses: the top option
Only if you have a Business Portfolio. If you do not have one, Facebook skips this step.
- 5
Instagram: the top option
Only appears if an Instagram account is linked to your page. If you only want Facebook, that is not an error, the process continues without Instagram.
- 6
Confirm the summary
Do not change anything, just click “Save”.
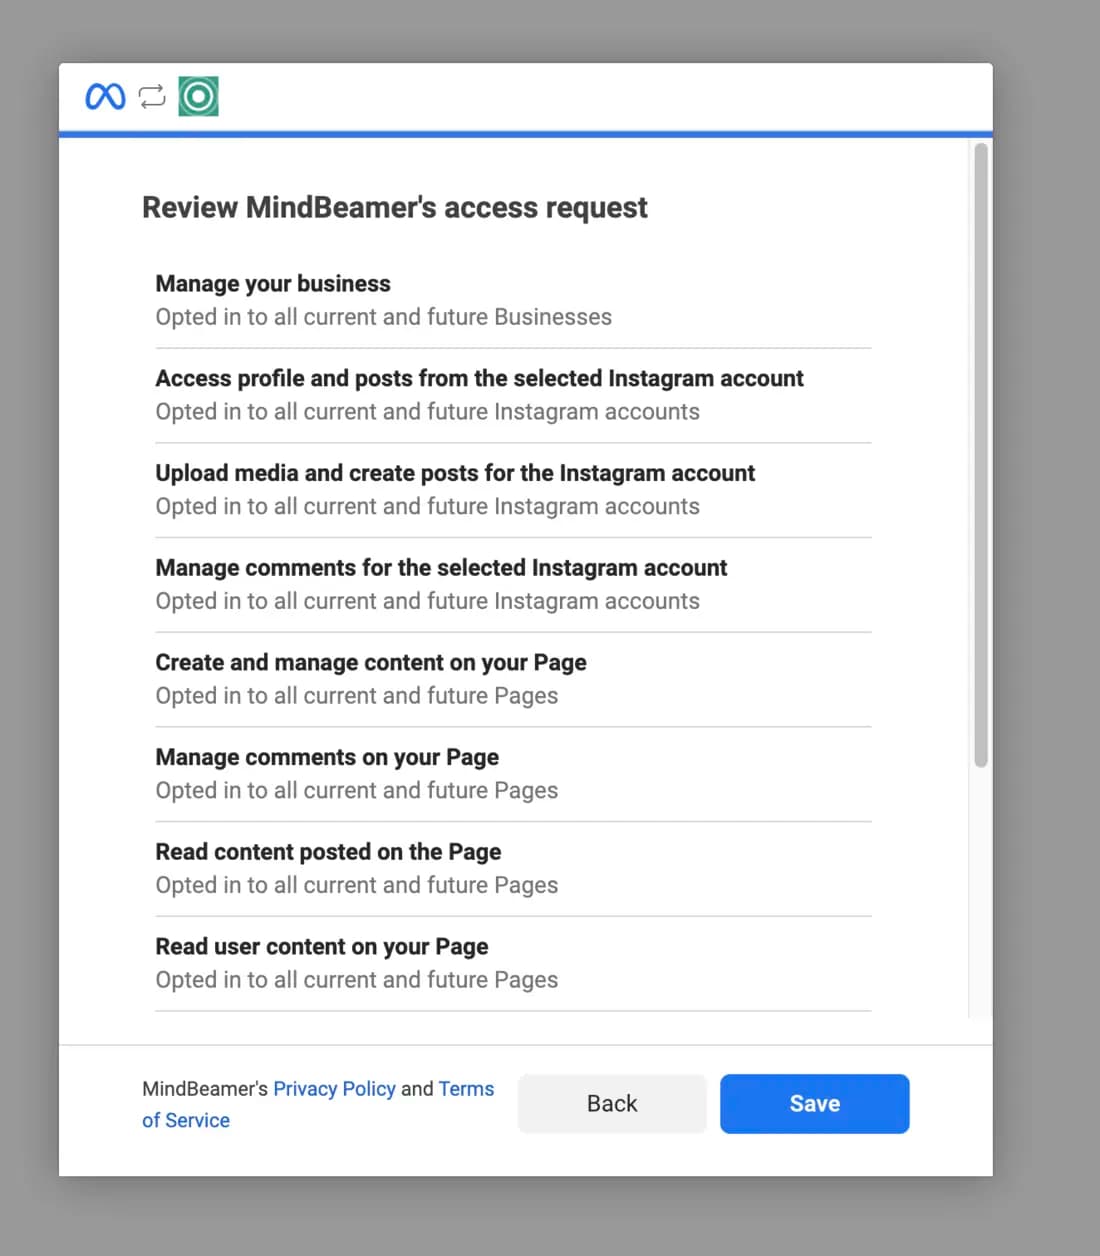
- 7
Facebook confirms the connection
Click “Got it”. You land back on MindBeamer automatically.
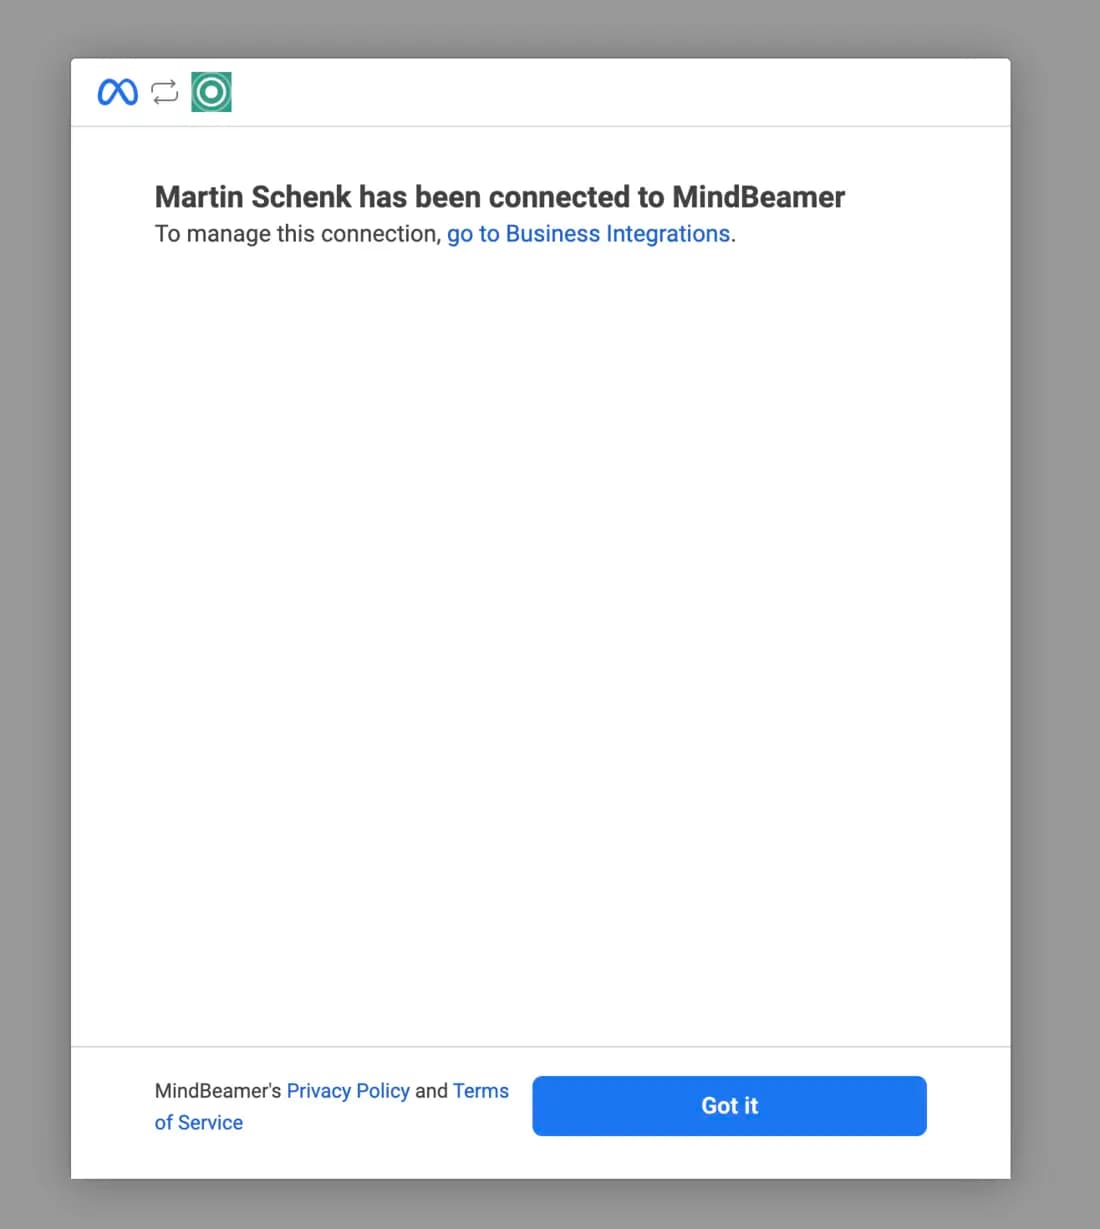
- 8
Pick the right page
Back with us, you see all your Facebook pages. Pick exactly the one that belongs to this project, we will only publish there.
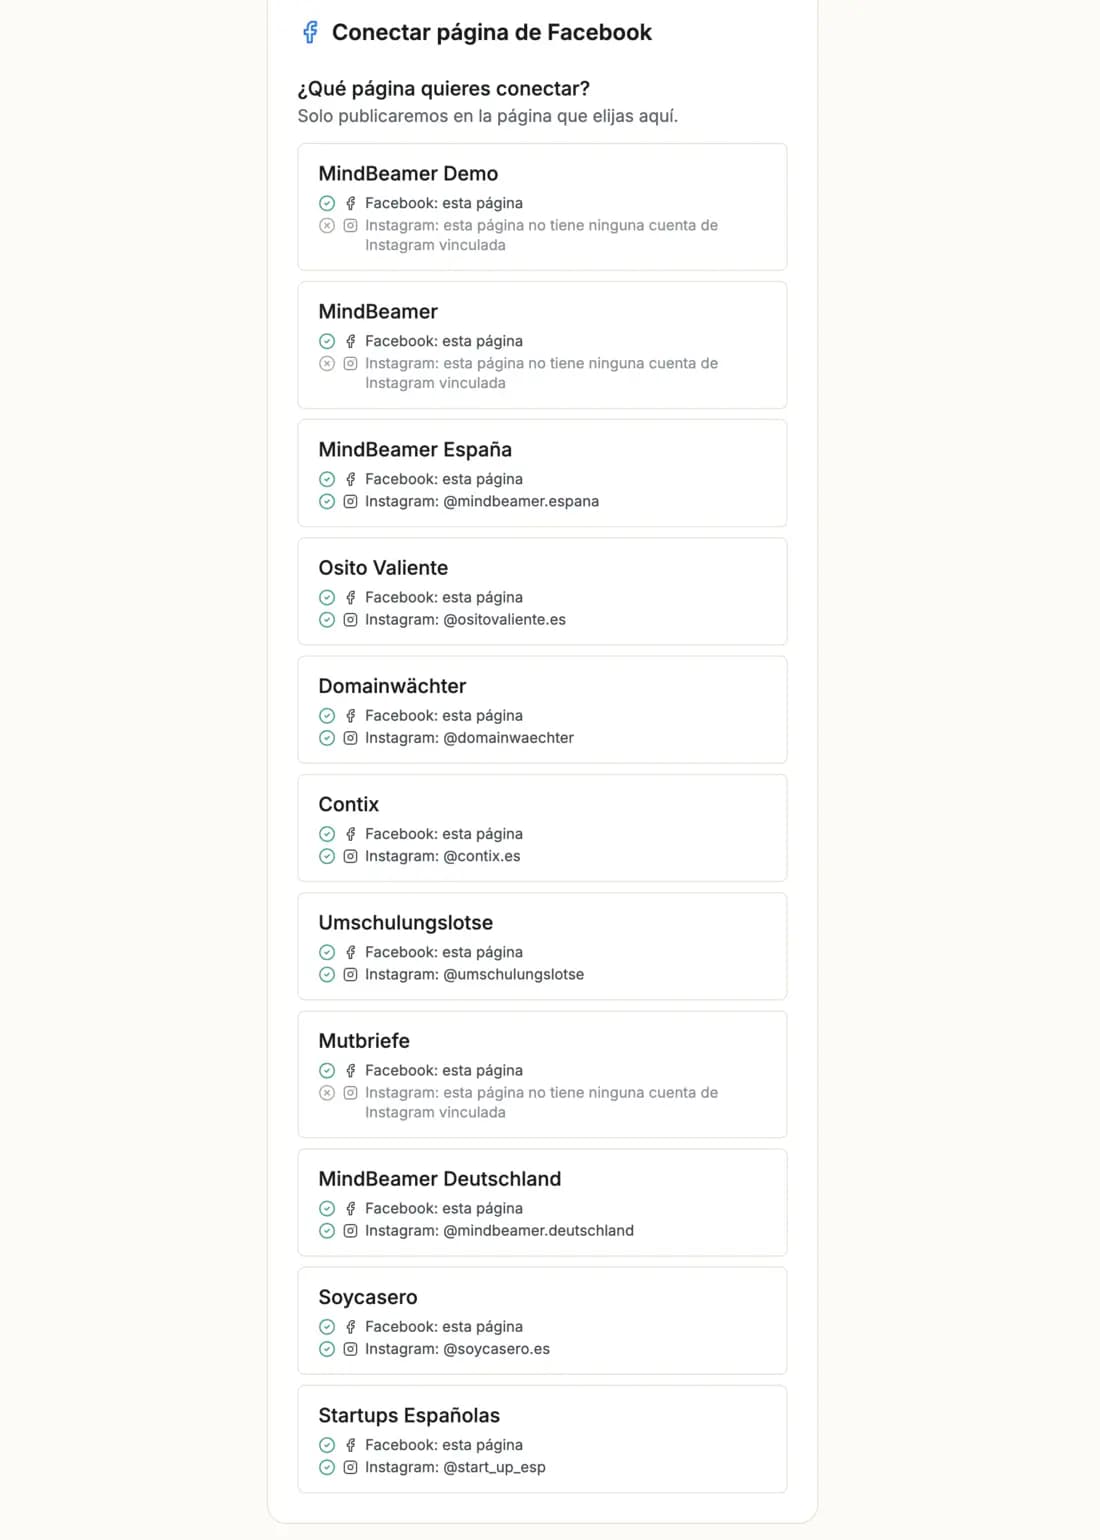
- 9
Done
Your page is connected. Use “Check connection” to verify it anytime.
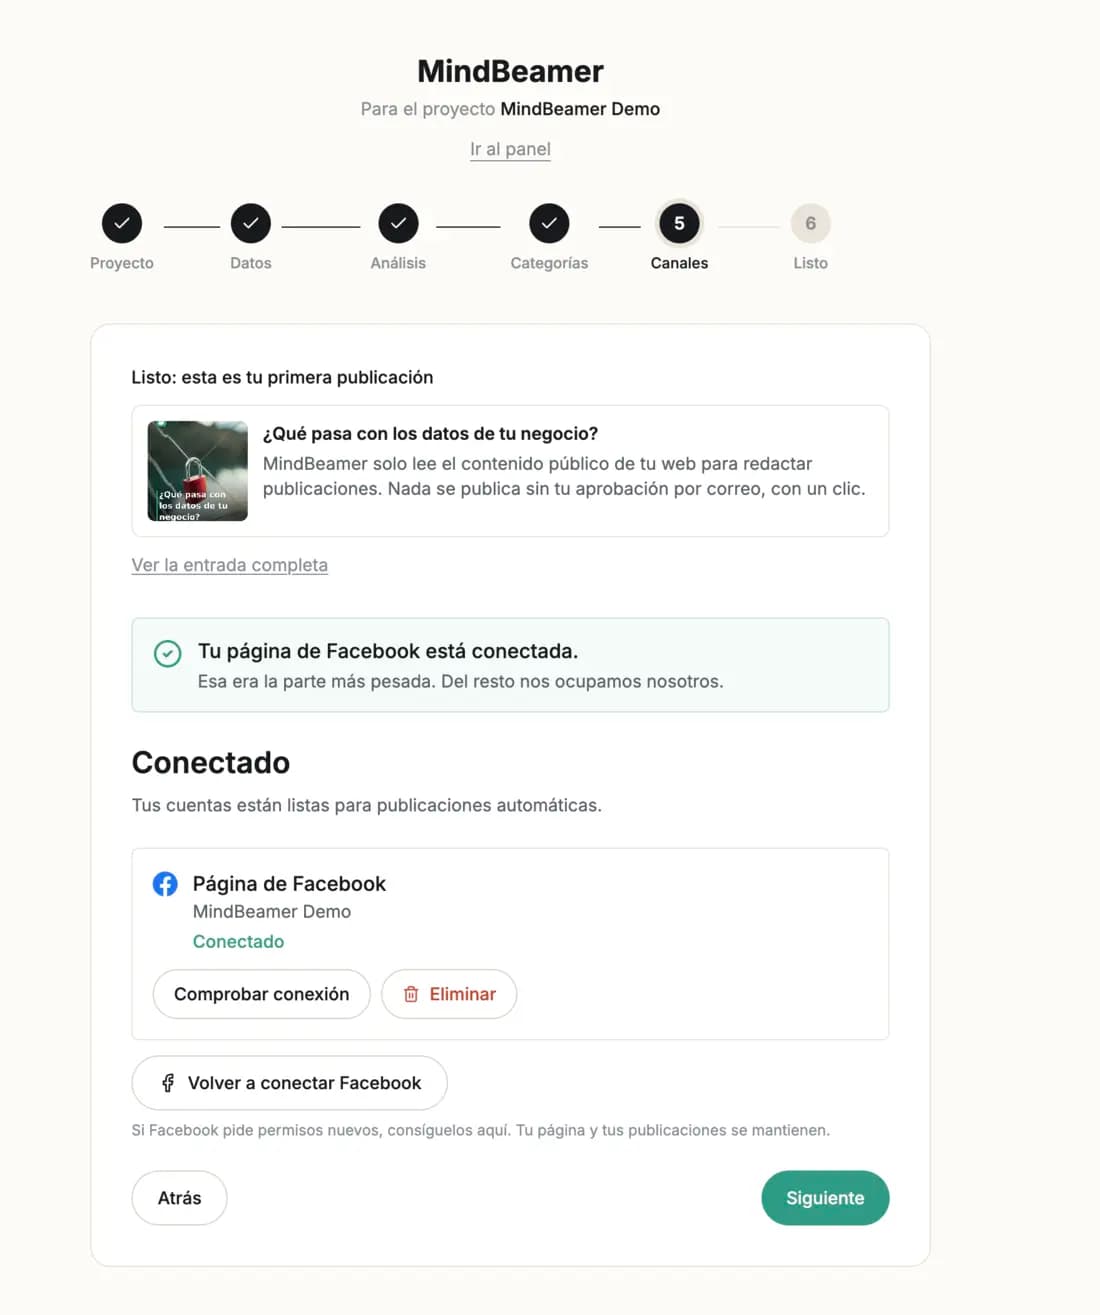
I only have Instagram
Instagram can never be connected on its own, only through a Facebook Page. It sounds like a detour, but it takes just a few minutes:
- Create a Facebook Page (free, 2 minutes).
- If your Instagram account is still private, switch it to “Business” or “Creator” in the Instagram app, under Settings → Account.
- Link your Instagram account to the Facebook Page: on the page, under Settings → Linked Accounts (in Meta Business Suite: Settings → Accounts → Instagram accounts).
The personal Accounts Center has nothing to do with this, it is the most common mix-up. Only once Instagram is linked to the page does it show up in the dialog above.
My page is not in the list
- The page is deactivated. Open your Facebook pages, the “Deactivated and deleted Pages” section, and reactivate it there. Open my Facebook pages
- You are logged into the wrong Facebook account in your browser. If you have two accounts, they often share the same name and only differ by profile photo.
- You did not check the page in the dialog. Just start again and pick the top option this time.
If your page is not in the list, do not pick another one. Connecting fully replaces this project's channels, a wrong page is worse than none at all.